Step 1: Read through and summarise the following information
Portrait photography is one of the most useful types of photography to learn because there are so many photography genres that involve shooting people; weddings, documentary/photojournalism, newborn photography, corporate head shots and editorial work, to name just a few.

There are four techniques that are important to perfect in portrait photography – the eyes, skin tones, framing (composition) and depth of field.
Skin Tones
When shooting people, especially close-ups, it’s important that the skin appears natural, rather than stark white, yellow or grey. Skin is the first area that will lose detail if a portrait is under or overexposed. Flash a big culprit when it comes to overexposed portraits.
To ensure skin doesn’t look washed out or flat, you need to fine tune the white balance in your image. You can adjust this in your camera (this is usually set to auto, but can also be set to daylight, tungsten or fluorescent for different types of lighting). You can also adjust this in your photo editing program while editing it often looks like a blue to yellow temperature slider.

Eyes
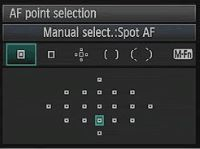
People are drawn to the eyes when looking at faces in photographs, because they reflect the mood and expression of the subject. Softness or blur in the eyes is a distraction, which is why it’s important for them to be in focus. Select a suitable aperture and set the AF points on the centre of eyes so that the details are sharp across the pupil, iris and the whites.


Framing and cropping
There are millions of ways to pose people for portraits, using different distances and viewpoints, ranging from full length shots to very close up shots (when only one feature fills the frame, such as the eyes or the lips).
However, there are some rules you should follow to avoid cropping your subject in a way that appears strange to the human eye. For example, cropping people right at the joint at the elbow, knuckles, ankle or wrist gives the appearance of a limb being “cut off”. Take a look at the image below to see where cropping is best done, when composing the shot and also when cropping using editing software.


Depth of field
Shallow depth of field is really desirable in portraits because the subject will be clearly separated from the background, helping their facial features to stand out. You can get this effect by shooting at a wide aperture < f 5.6 and creating more distance between your subject and background.

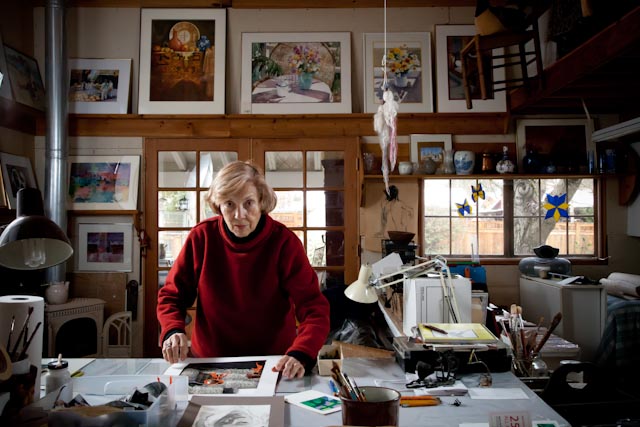
Sometimes a greater depth of field and more in focus in the image can be used to create a portrait where the envirnoment/background adds to the image. For example enivronmental portraiture.
Step 2: Test out these tips, taking three portraits with different composition & framing of your subject – also try to keep in mind the lighting. Edit as you please.
- Headshot – including shoulders
- Environmental Portrait – Full length shot landscape orientation
- Wider shot showing full body or medium shot – Using leading lines eg. Shooting along a wall or fence, or path.


Step 3: Add everything to your Visual Diary Including a reflection
Suggested questions for reflection:
- What did you like about this task?
- What was difficult?
- How did you solve problems?
- Is your image successful, if so, why?
- What adjustments (edits) did you do to your image?
- What else could you change if you had more time or resources?
