Create HDR bracketed images using a DSLR and tripod. Merge photos in Lightroom. Provide at least 1 example and your reflection.
Bracketing is the process of taking three photos; one using the camera’s recommended settings, one intentionally underexposed, and one intentionally overexposed. This that you can get a good exposure and cover more of the dynamic range.

Bracketed photos are used later to create an HDR (high dynamic range) photo.

If you look at the example images above for example, you can see that in one the wall is too dark and the other the sky is blown out. By taking a series of photos around the exposure you are able to exposure correctly for the different areas. Merging them together to create the image below.

A HDR photo done correctly looks natural and pleasing to the eye, it shouldn’t look “overcooked”.
How to Bracket Photos for HDR (on DSLR)
- Set your camera on a tripod.
- Select a bracketing mode in your camera settings. Most cameras have it somewhere; please refer to the user manual.
- Select an appropriate number of brackets for the scene.
- Set camera on 2 seconds delayed shutter. If you have this timer set, the camera will take all the brackets automatically. You won’t have to click the button many times. It prevents the slightest camera movements and makes the blending easier.
- Click the shutter button.
Exposure Settings
The big question here is – how many “brackets” to shoot the under exposed and over exposed photos?

The brackets are measured in terms of the numbers on the light meter. These are often referred to as “stops”
There are examples of bracketing settings that I use:
- 0, 2 stops over and 2 stops under – for most scenes
- 0, 2 stops either side and 4 stops either side further brackets for something really contrasty e.g. when there is a sun in the frame along with some dark cliff.
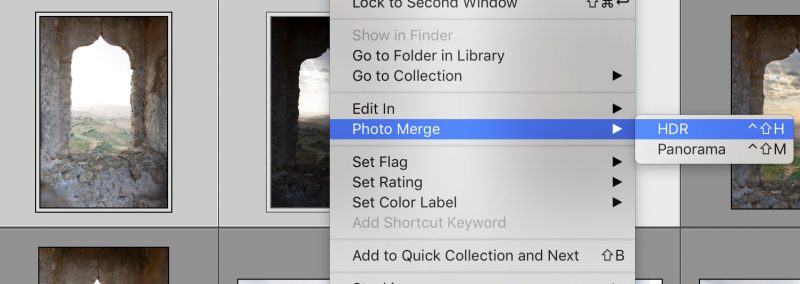
Merging Bracketed Images Into HDR
The most common tools photographers use for editing are Lightroom and Photoshop. Both software can merge frames into a single picture.
You need to select the brackets, right click and then choose Merge to HDR, wait a bit, and that’s it.
There are a few other ways to merge the images in Photoshop, and deghost and blurred areas.
ACTIVITY: Take a series of photos using the steps above to practice this method in Lightroom this lesson.
HDR on your Smartphone
If you’re using anything newer than, say, a Samsung Galaxy S4 or iPhone 4S, your smartphone is likely equipped with HDR capability.
To start using it, turn your camera mode to HDR or Rich Tone.
If you’re using an iPhone, go to Settings — Camera.
- Turn on ‘Auto HDR’ if you want your phone to make the call on when to use this mode. Otherwise, simply select.
- While you’re here, make sure you tell your phone to keep a copy of the standard photo as well (this way, you can compare your HDR photo with your standard photo and decide which one you like best).
- Then, click on your camera icon and choose HDR in the upper left corner of your screen.
- Take your shots!
Note: Keep your phone as stationary as you can, since your phone will be capturing a few shots at once and needs to stay steady during this time. You can buy an adapter for your tripod or use natural surroundings to stabilize your phone… just be sure not to leave the phone behind when you’re done!
Suggested template for reflection:
- What did you learn from this task? (Use “I can…” as a sentence starter)
- What did you like about this task?
- What was difficult? (Use “I am struggling with…” as a sentence starter)
- How did you solve problems?
- Is your image successful, if so, why?
- What adjustments (edits) did you do to your image? (include before and after and camera settings if available)
- What else could you change if you had more time or resources?
