The composition are about how the photo is arranged.
Think about:
- Where is the main subject positioned?
- What is in the foreground and background?
- If it is a person, is it a close up or a headshot? or a full body portrait? Is it cropped from their waist?
Below I have included some images showing some basic composition ideas. More than one can also exist in one photo.

Here is a more detailed overview of some of the composition rules (with examples) –
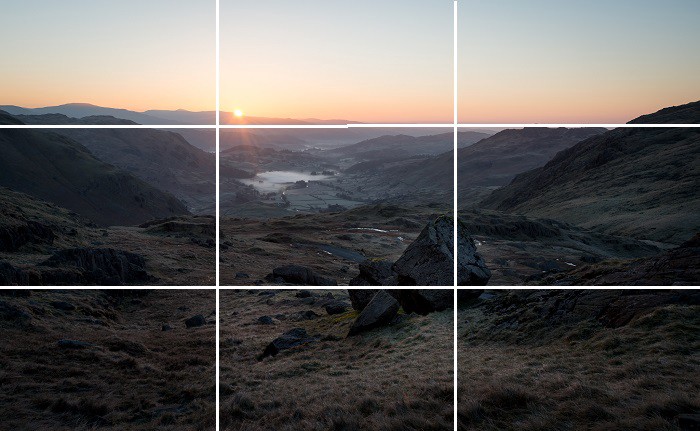
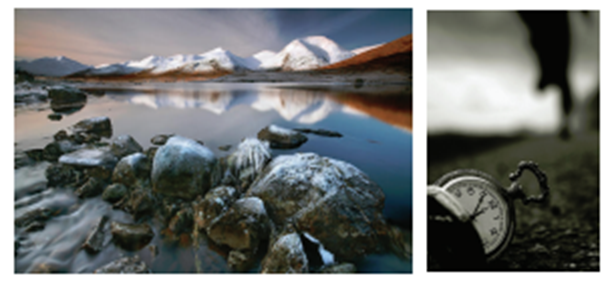
Rule of Thirds
Basically, you should image your frame divided up into nine equal rectangles, so there’s an overlaid grid on it. The most important aspects of your image should be placed at the intersection of these gridlines, with any lines within your image trying to follow the gridlines as well.
See the image below for example. The main foreground material are these huge irregular boulders, placed on the intersection in the bottom right. The horizon runs along the top third of the gridlines, with the rising sun and mist shrouded valley occupying the important space around the top left intersection and creating a more balanced photograph.
The theory is that it creates a more balanced photo and allows the viewer’s eye to drift around more naturally. There are many studies showing that people’s eyes tend to go to one of these intersection points first rather than dead centre.
PLACE MOST IMPORTANT ELEMENTS ALONG THESE LINES/ AT THE INTERSECTING POINTS
- Provides balance
- Provides interest
Movement of the Eye/Flow
This is the number one thing you should think about before taking any photograph. How will the viewer’s eye react to this scene? Top to bottom, left to right, how will a person’s eye move around your photograph?
What we want is for the eye to flow around the photograph, and ideally stay within the frame. If a viewer’s eye is drawn outside the frame then we’ve lost their attention for all intensive purposes. We can utilise a number of techniques to try and keep the viewer’s attention, but this is the first question to ask yourself before taking a photograph.
One important aspect to note is distractions. Are there any distractions that take away from your main subject(s)? If so, think about ways to remove them from the image.
Border Patrol/Fill the frame
Skirt your eyes around the edges of your frame in every photo and make sure there are no unwanted subjects invading from the borders.
This means any stray tree branches, half of a rock that looks unsightly, or a disembodied hand floating around. These invaders become unwanted distractions, and with them being so close to the edge of your photo they inevitably lead to the viewer’s eye leaving the frame. And remember Rule 2 — We don’t want that happening!

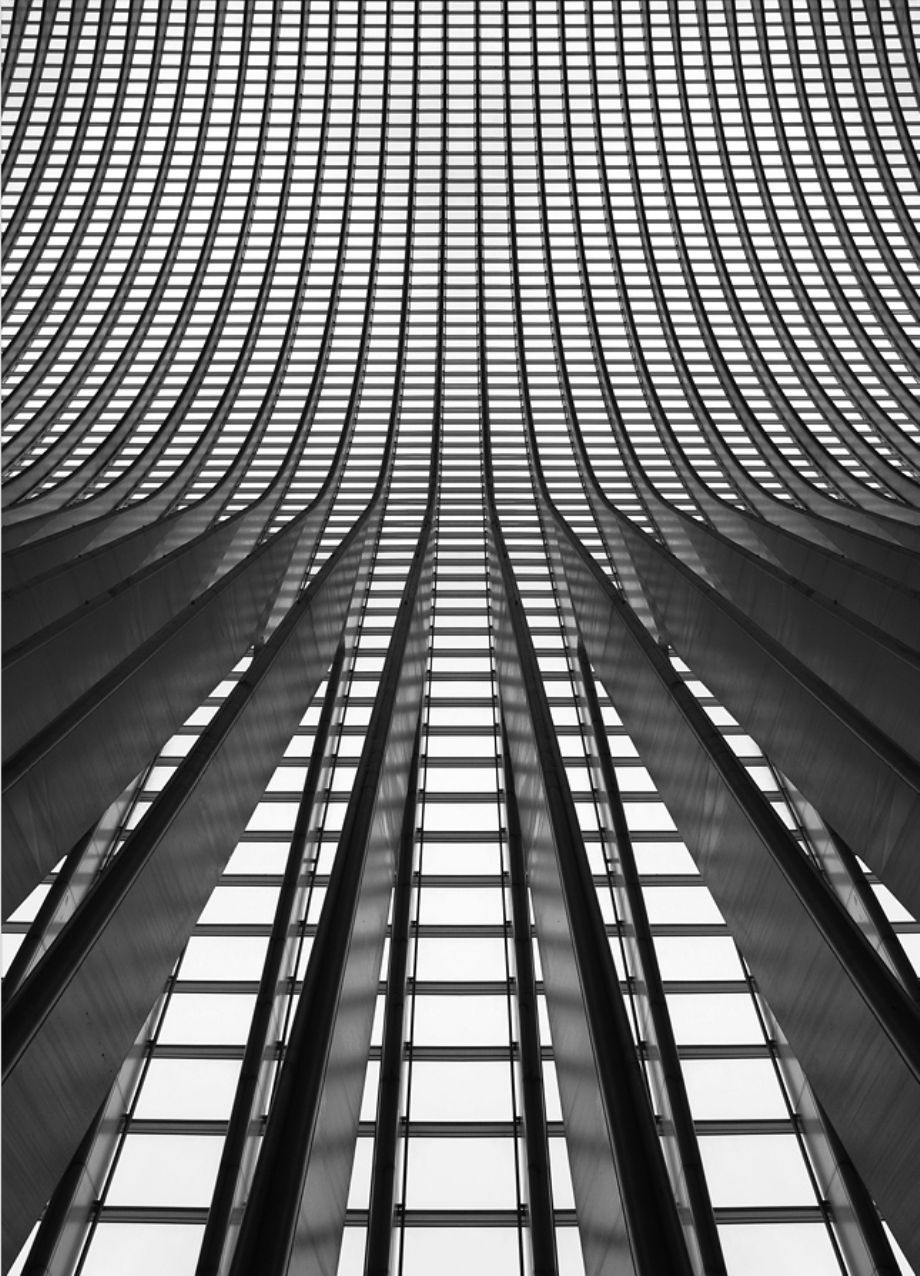
Leading Lines
We want to look for lines within our image that draw the viewer’s eye into the scene rather than away from it.
These can be physical lines such as fences or walls or more metaphorical lines such as shadows, or even a hand pointing into the image. Many subjects can be used for leading lines, and they can really add a sense of depth to a photograph.
That, in fact, is one of our main challenges as photographers. We are trying to portray a three-dimensional scene with a two-dimensional photograph, so anything we can utilise to enhance the sense of depth is very useful.

Rule of Odd Numbers
Studies have shown, and I actually have no idea why, that people prefer odd numbers over even numbers when looking at something. For some reason people feel more at ease when looking at photographs with an odd number of subjects, so it’s something we can utilise to further enhance our photography composition.
Obviously there are some areas where this just doesn’t work, such as wedding photos to take one big example. However, a lot of other scenes can use this guideline, such as including just three trees instead of four, or getting a candid group shot of five people instead of six.
This might not seem like such a big change, but I guarantee that now I’ve put it in your brain you will start to notice it everywhere!
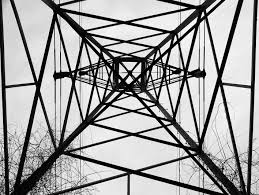
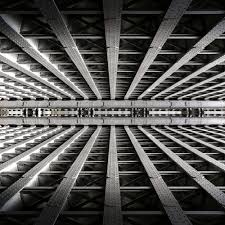
Symmetry & Patterns
Break symmetry or patterns- INTRODUCE TENSION AND FOCAL POINT TO SCENE
“EYE CATCHING”- especially in situations where they are not expected
Natural or Man-made
Symmetry: horizontal, vertical, radial
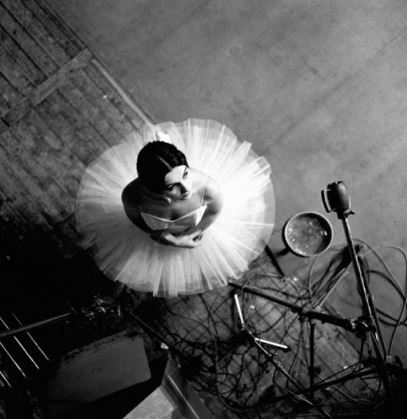
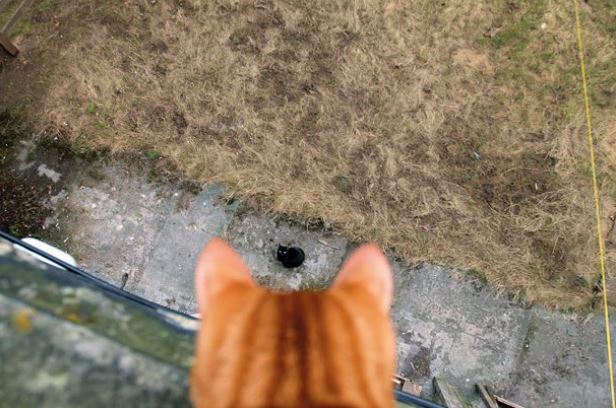
Viewpoint
Before taking photograph- take time to think about where you will shoot from. How can I make this different from the standard shot at eye level? What meaning does it provoke in the image?
Viewpoints:
- High above (Bird’s Eye)
- Down on ground (Ant’s Eye)
- From side
- From back
- From long way away
- From close up

Depth and Overlapping
Photographs are 2D representation of a 3D world. To emphasise the dimensionality we can use depth and overlapping to our advantage.
Compose to create Depth→ OVERLAPPING DELIBERATELY OBSCURE ONE OBJECT WITH ANOTHER -Objects in foreground -Objects in middle ground -Objects in background
Eye recognizes layers -mentally separates them -(creating more depth)
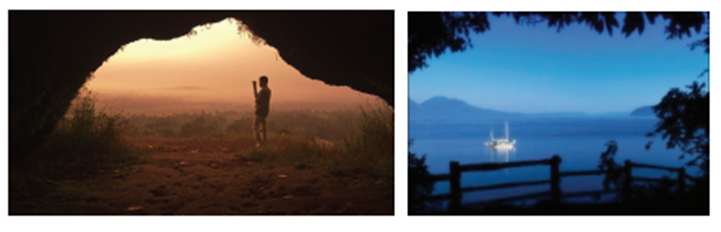
Framing
World full of objects to make perfect NATURAL FRAMES
HELP ISOLATE MAIN SUBJECT FROM OUTSIDE WORLD
Result: more focused image/ draw eye in
Examples:
- Trees
- Archways
- Hills
- Holes