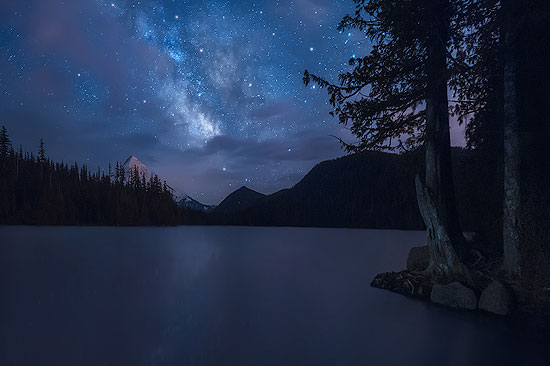
What is amazing about shooting the starts with a camera is you are able to capture what may not be clearly visible by the human eye.
Set up is very similar to the previous two types of long exposures. But the settings and the focusing require more precision.
Planning
Alot of astro photography is in the planning. You can rarely just go out at night and expect to get a shot.
What phase is the moon in? How big/bright will it be and will that impact your photos? (50% or more and it will be too bright to capture stars clearly)
Will it be a clear night? Is there going to be cloud cover? Use an app like “Windy” (free) to see if there is cloud cover expected.
Where are you going to go? You will need to take into account light pollution and the direction of the milky way (if that is what you are trying to capture) There is a few free apps available or you can use this site.
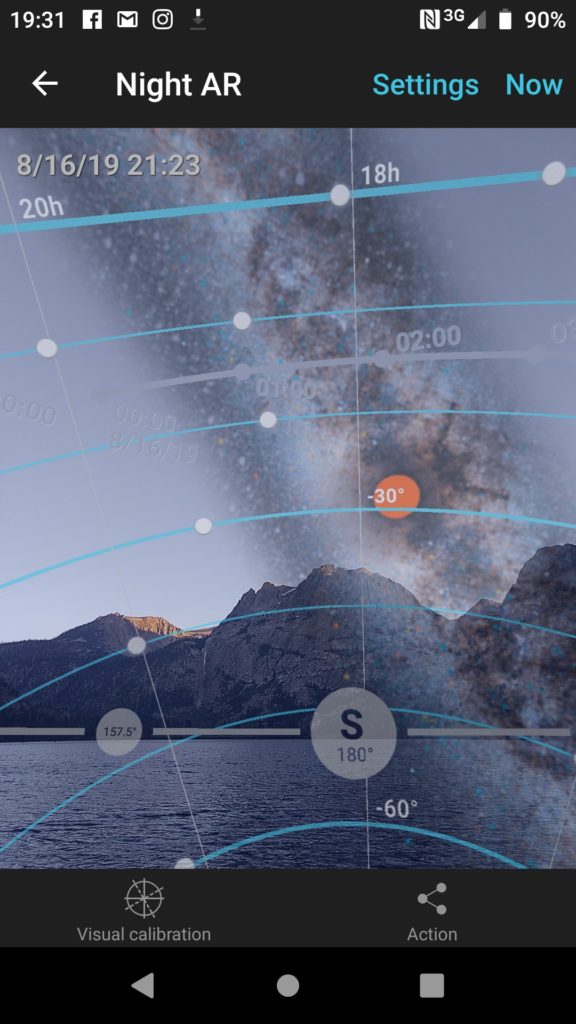
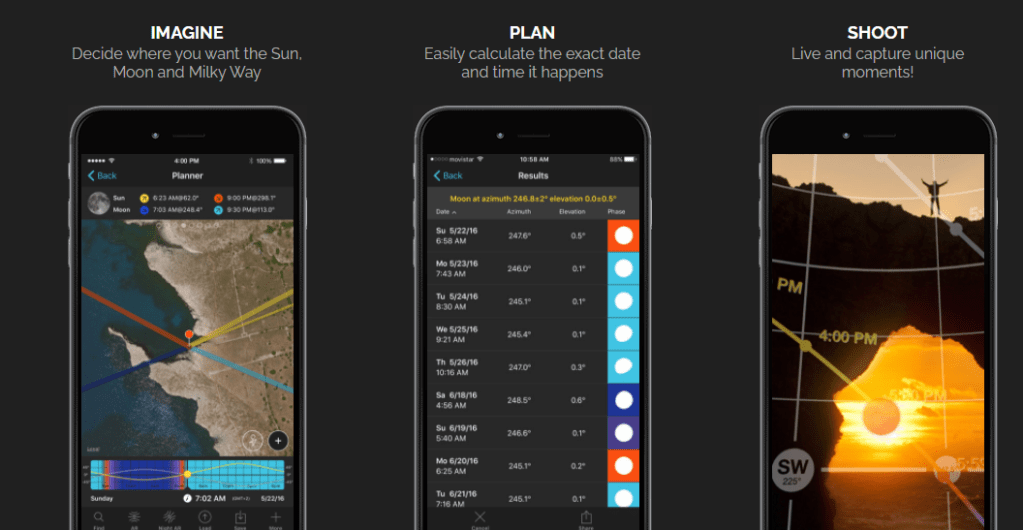
Finally, which way do I point the camera? PhotoPills is the best app. Has many useful features for planning your photos around what the sky is doing. My favourite feature is the 3D Augmented Reality view. It will show you the path of the Sun, Moon and Milky Way when scouting a potential photo, film or time-lapse location (See right).
Camera settings
Ok, so you have your location, date and time planned out now what settings do you use?
- Camera on a tripod
- Use manual or bulb mode
- Use a “fast” aperture of F/2.8 – F/4
- Set your white balance setting to daylight or auto
- Set your exposure length to 15-30-seconds
- Shoot in RAW image format
- Use Manual Focus
- Use an ISO of 400-1600 (or more)
- Use the 10-second delay drive mode
There are a guidelines you will also need to take into account “The 500 rule”. This is a calculation that is used to give you a useful exposure length to avoid star trails. The focal length (magnification) of your lens and the camera you use (crop-sensor, full-frame, etc.) will decide the length of time you can expose the shot before stars begin to trail.
500 Divided By the Focal Length of Your Lens = The Longest Exposure (in Seconds) Before Stars Start to Trail
This website does the calculation for you. (Your welcome!)
Focusing and composition
To focus your camera lens, find the brightest star you can find in the night sky (or the moon/bright planet). Turn on the “live-view” mode of your camera, which essentially turns the display screen into a live video of what your sensor sees. Using the camera settings listed below, you should see at least one bright star on your camera’s LCD display screen.
Camera Settings for Focusing the Lens:
- Mode: Manual or Bulb
- Lens Mode: Manual Focus
- Aperture: F/4 or below
- White Balance: Daylight or Auto
- Exposure: 30-seconds or Bulb
- ISO: 1600 or above
You can adjust your settings here to have a brighter view to focus. If your camera and lens allow you to set an ISO of 12800 and set your lens to F/2, you’ll likely see many stars in the live view display.
You will want to dial back the settings before actually taking your picture, but these camera settings are important when focusing your lens.
With your composition, it might be interesting to have some elements in the foreground or framing the image to give more scale to the sky.
From here its trial and error. You can get more technical and devices or apps that enhance this experience but it is definitely possible to get amazing photos without these.
This video shows the main points covered above in a short, clear way.
Light Painting Technique
Once you have a good base exposure for your scene, you can start adding light. This is where things really get fun and you can create some interesting images. Start out with just a little bit of light on a single object in the foreground, just to see how it looks.

Editing Astrophotography
Here are some further videos if you are looking to dive deeper into this genre
This guy has a whole channel devoted to Nightscape images and capturing stars. I watched a few of these and they are great.
This one showed in detail light painting and in depth editing.
For your Visual Diary, add a new project titled the same as this page. Take some examples of this in class and add with the camera settings to your visual diary.
I also recommended going out and testing this at a different location on the weekend. Book a camera and tripod here. You could potentiality use some of these images for your Prac 1 task.
After you take the photos include them with the below reflection in your Visual Diary.
Suggested template for reflection:
- What did you learn from this task? (Use “I can…” as a sentence starter)
- What did you like about this task?
- What was difficult? (Use “I am struggling with…” as a sentence starter)
- How did you solve problems?
- Is your image successful, if so, why?
- What adjustments (edits) did you do to your image? (include before and after and camera settings if available)
- What else could you change if you had more time or resources?
